In this tutorial I will take you through everything needed to install CyberPanel on Ubuntu. I will include all the necessary commands or lines of codes as well as explain the different options that you will face while installing the CyberPanel.
Now that the free CentOS is going to be discontinued, it is better to install your CyberPanel on Ubuntu for long term projects. So, I am including only the commands for installing CyberPanel on the Ubuntu server.
NOTE: After writing every command or line of code, you will have to press Enter on your keyboard to proceed.
STEP 1: Connect to your virtual server using an SSH client (e.g. Terminal on Mac or Ubuntu, or Git Bash on Windows).
STEP 2: Log into your Ubuntu server using the following default username:
ubuntuHere, ubuntu is the default username for Ubuntu systems but you might have a different username if you have changed your system username or you have received a different username from your hosting provider.
After writing this on the terminal, press Enter on the keyboard.
Because you are connected using a key pair or private key that you received when setting up your server, the terminal won’t ask for your password. However, if you aren’t connecting using the key pair or private key, the terminal will ask you for a password and you will be required to provide the password that you have set up by yourself or that you got from your hosting provider.
NOTE: if you aren’t prompted to log in from the terminal, this step wouldn’t apply to you.
STEP 2: Now to install CyberPanel, you will need to have root permission. So, use the following command:
sudo su -STEP 3: Before installing anything, you can update all the packages on your Ubuntu system. So, to update, use the following command:
apt update && apt upgradeHere, update is used to update the list of available packages and their versions and then upgrade is used to install or upgrade to the newer packages found from the updated list.
STEP 5: Now you are ready to download and install the CyberPanel scripts. Use the following command:
sh <(curl https://cyberpanel.net/install.sh || wget -O - https://cyberpanel.net/install.sh)While installing the CyberPanel scripts, you may be prompted to select an option for multiple times. Below are those options with explanation of which one you need to select for your use case.
The first option will be this one.
1. Install CyberPanel.
2. Addons and Miscellaneous
3. Exit.
Please enter the number[1-3]:
Here, type the following to proceed to installing CyberPanel.
1Then you may see this option:
1. Install CyberPanel with OpenLiteSpeed.
2. Install Cyberpanel with LiteSpeed Enterprise.
3. Exit.
Please enter the number[1-3]:
Here, the option 1 will install OpenLiteSpeed which is the free version of LiteSpeed web server. Selecting this one will also use the free version of CyberPanel. Conversely, the option 2 will install LiteSpeed Enterprise web server. If you choose this option, you will need license key for the LiteSpeed Enterprise and CyberPanel. The license key can be for free or paid depending on the LiteSpeed Enterprise plan you obtain.
If you go with OpenLiteSpeed, you can later upgrade to LiteSpeed Enterprise from the CyberPanel dashboard. But you can’t go from LiteSpeed Enterprise to OpenLiteSpeed. In that case, you will need to start from scratch like reinstalling the operating system and CyberPanel and then moving your site there. I will be going with the OpenLiteSpeed server and so type the following in the terminal.
1Next, you may see this option:
Install Full service for CyberPanel? This will include PowerDNS, Postfix and Pure-FTPd.
Full installation [Y/n]:
Here the PowerDNS will allow you to create your own private authoritative DNS server/nameserver, Postfix will allow for email hosting, and Pure-FTPd will allow using FTP with your sites. If you know you don’t need these services, you won’t need to install them. But they may later come handy. So, I will install them and therefore type the following in the terminal.
yNext, you may see this option:
Do you want to setup Remote MySQL? (This will skip installation of local MySQL)
(Default = No) Remote MySQL [y/N]:
As it says, selecting this option will allow you to setup remote MySQL database but will skip installing it on your server. If you want to use a remote MySQL database, you can go with yes. But if you don’t know what it means, go with no. I don’t need to use remote MySQL so I will go with type the following:
nNext, you may see this option:
Press Enter key to continue with latest version or Enter specific version such as: 1.9.4 , 2.0.1 , 2.0.2 ...etcIf you don’t want to use a specific previous version of CyberPanel, you don’t need to care about this one. So, just press Enter.
Then you may see this option:
Please choose to use default admin password 1234567, randomly generate one (recommended) or specify the admin password?
Choose [d]fault, [r]andom or [s]et password: [d/r/s]
This option is useful to set up the password you want to use for logging in to the CyberPanel dashboard. That is to say, the default CyberPanel login username is admin and the default password is 1234567. If you want to keep using the default password, go ahead with option d. If you want CyberPanel to randomly generate you a password go with option r. And if you want to use your own password, choose option s which will require you to enter your own password.
You will get to see the password at the end of your CyberPanel installation. And you can always change this password later using the adminPass command followed by your new password like adminPass newpassword. I will go with the random one, so type the following in the terminal.
rNow, you may see this option:
Do you wish to install Memcached extension and backend?
Please select [Y/n]:
Memcached is an object caching system. It can be useful for your website speed optimization. So, I will install it and therefore use the following command:
yNext, you may see this option:
Do you wish to install Redis extension and backend?
Please select [Y/n]:
Redis is also a similar object caching system like Memcached. In fact, Redis can do what Memcached does and more with better efficiency. That’s why, Redis is now more popular. You can use Redis and Memcached as alternatives or install both and then select anyone for specific websites. So I will also install it and so type the following:
yNext, you may get this option:
Would you like to set up a WatchDog (beta) for Web service and Database service ?
The watchdog script will be automatically started up after installation and server reboot
If you want to kill the watchdog , run watchdog kill
Please type Yes or no (with capital Y, default Yes):
Watchdog can monitor the basic health of the server and can take some actions in case of any issue. For instance, it may automatically restart the server if the CPU is overloaded, run some defined scripts in response to some specific events in order to repair any errors and so on. But a misconfigurations in watchdog can cause some issues like endless reboot loop, file corruption due to hard reset and others.
This feature is still in beta in CyberPanel. But you can still choose to use it. I will go ahead and use it so type the following:
YesThese should be all the options that you get while installing CyberPanel.
It may take a few minutes to download and install the scripts. So, wait until the download is completed and your terminal is ready to take a command.
After the installation is completed you will see a message like the following:
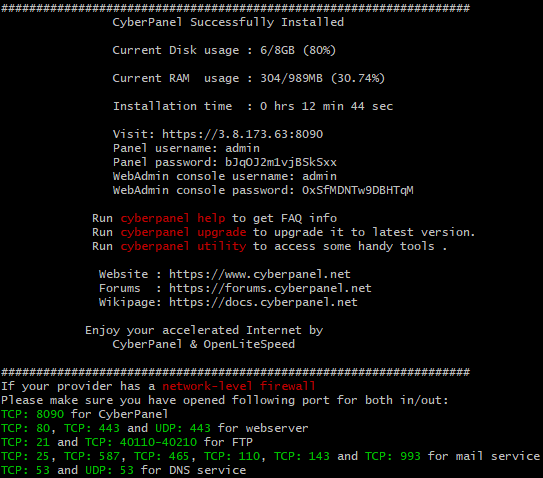
Here you will find your CyberPanel login URL, username and password as well as the phpMyAdmin username and password.
At last, you will see an additional option to reboot your server as following:
Would you like to restart your server now? [y/N]:If you want to restart, type y, otherwise, type n. That’s all you needed to Install CyberPanel.
STEP 6: After the installation of CyberPanel, you can access it from your web browser. Enter your servers’ Public IP address followed by :8090 at the URL bar on your web browser and press Enter on your keyboard to access the CyberPanel control panel. The URL that you need to enter in the URL bar of your browser will look something like the following:
https://3.8.173.63:8090Here, 3.8.173.63 is the Public IP address so it will be different for you. And 8090 is the port used to access CyberPanel dashboard.
If you get a warning from your web browser saying the connection isn’t secure, don’t worry. It may happen because CyberPanel uses self-signed SSL certificate but it is nothing to worry about. Therefore, you just need to ignore the warning and find a button on the page that allows you to go ahead on the page. For instance, on Chrome you will need to click on Advanced then click on Proceed to … (unsafe) button to enter into the CyberPanel Login page.
STEP 7: To access the CyberPanel control panel, it will require your username and password.
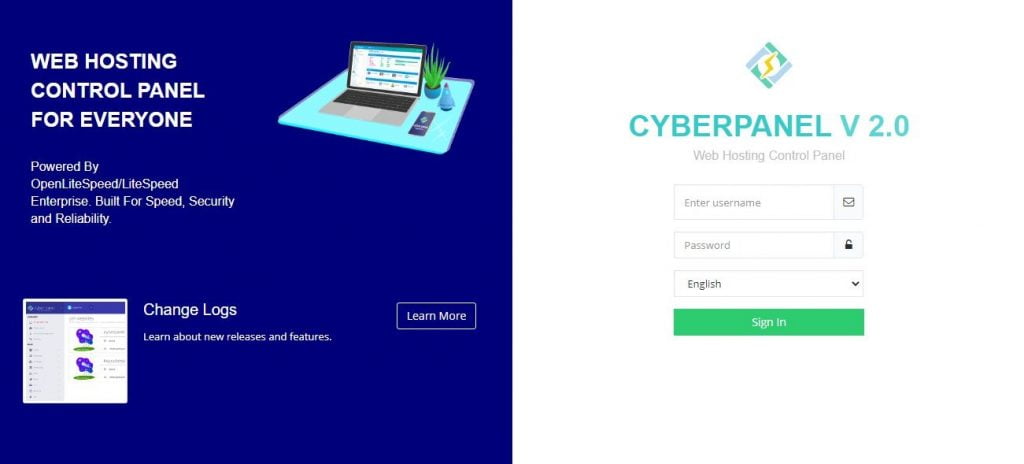
Enter the username and password as follows:
Username: admin
Password: default is 1234567; random or your own password is shown at the terminal after the successful installation of CyberPanel.
Now, click on the Sign In button to go ahead.
PS: Here is a video of how to install CyberPanel from its founder. He installs it on AWS Lightsail in this video.
nope didnt work wont let it even run...:(
if you're trying to run it on lightsail, you have to run this command first. sudo su -
once you do that you'll be in root and should be able to run the installer