It is pretty simple to eliminate render-blocking resources WordPress. You just need to delay the loading of all CSS and JavaScript files in your WordPress site. This will, however, require you to take advantage of something called critical CSS. Eliminating render-blocking resources in WordPress will significantly increase the perceived loading speed of your WordPress site as well as the total load speed.
It is among the few things that will actually give a noticeable speed improvement. Eliminating render-blocking resources is mostly based on improving the experience that your website visitors have on your site. In fact, you will see a large improvement in your Google PageSpeed Insights score after implementing it on your site.
What Are Render-Blocking Resources
Render-blocking resources are CSS, JavaScript, fonts, or any other resources that, when found on a webpage, cause web browsers to immediately start downloading them by stopping the rendering/processing of the webpage/HTML file.
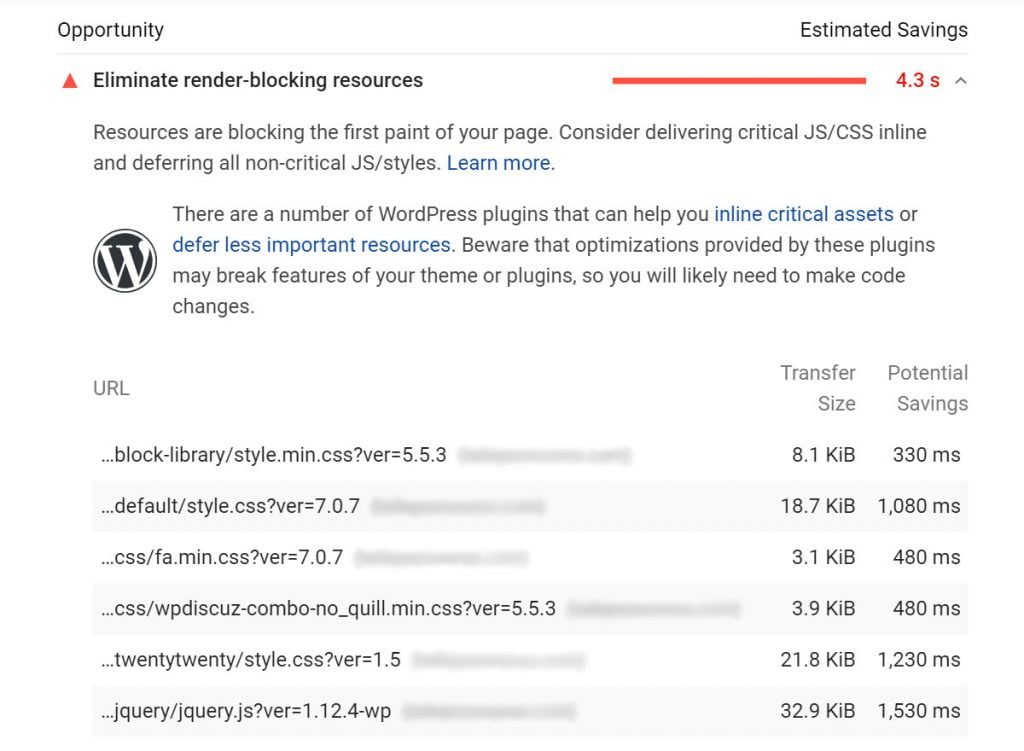
Google PageSpeed Insights shows eliminate render-blocking resources warning for only two types of resources which are CSS and JavaScript files.
If the concept of render-blocking resources sounds a little difficult to grasp, here you go.
When you visit any webpage, your web browser first needs to download the webpage document (HTML file). Then the browser starts to render that webpage in order to show it on your screen. Browsers do this rendering in the top-to-bottom order of the elements on the webpage. However, if the browser finds any resources like HTML, CSS, or fonts while rendering the HTML file from top-to-bottom, the browser will stop rendering the rest of the HTML file in order to download and process/parse those newly found resources.
Because the browsers need to stop rendering the webpage because of those resources, they are called render-blocking resources. Also, as the browser can't render the webpage until those resources are downloaded and executed, you don't get to see any more content on your screen in that time.
These render-blocking resources are generally placed in the <head> of the HTML file which is located before any of the website contents that you see on the screen. So, you don't actually get to see anything on your screen until those resources are downloaded and parsed. As you guessed, this in turn creates a very bad experience for the users. To make the matter worse, some of these render-blocking resources might not be necessary for the above the fold contents (contents that you see on your screen without scrolling) or even for the entire webpage at all. This unnecessarily blocks the webpage rendering for even more time.
So, by eliminating these render-blocking resources, you can see the website contents much faster on your screen. This in turn significantly improves the perceived load time of the website.
How To Eliminate Render-Blocking Resources
Before we go any further, let's clear something up. The eliminate render-blocking resources warning doesn't actually mean removing or deleting these resources from your website but rather to properly optimize how they are loaded on your site.
Website files are loaded synchronously by default. This means web browsers can do only one thing at a time. So, when the browser is working with one file, it can't work with any other files. In this context, the downloading or execution of some resources (like CSS and JavaScript) blocks the execution/rendering of the webpage/HTML file. Therefore the resources become render-blocking.
But there is another option called asynchronous loading which allows specified resources to be downloaded when the browser is doing something else like executing a different file or downloading other files.
Therefore, asynchronous loading makes it possible for the browser to download the render-blocking resources while it is doing something else like rendering the HTML file, downloading other resources, or others. So, asynchronously loading the render-blocking files will eliminate those files from being render-blocking.
CSS
CSS files can't be directly loaded asynchronously but we can use a simple trick to overcome this. That is by using a little bit of JavaScript inside the <link> tag of the CSS files.
The trick is to use the media attribute set to a not-matching value (these values for the given attribute are recognized by the browsers but don't apply to the current environment) and using the onload event that sets the value of the media attribute to all after the file is downloaded. That is to say, this onload event will fire as soon as the file is downloaded so the media value will be changed to all immediately after the file is downloaded.
When the value of the media attribute in any <link> element doesn't match the current environment (i.e., not-matching value), the browser will download the file while it is doing something else like rendering the webpage/HTML file. Then after the file is downloaded, if the value of the media attribute gets changed to all, the file will be executed and applied for all media types, in this case, expecially screen. Therefore, when these two techniques are used together, the browser will load the file asynchronously.
Now, the value print for the media attribute can be a not-matching value because it is a proper value for this attribute but it will only apply when the webpage is getting printed and, in this case, not when it is being viewed on a screen.
And the value none for the media attribute can be a not-valid attribute because it isn't a proper value for this attribute at all.
This same outcome can be expected by initially using a not-valid value (these values for the given attribute aren't recognized by the browser at all) for the media attribute but the not-valid values will have a chance of not getting downloaded at all which will cause the website to be broken. So, that wouldn't be a good way of asynchronously loading files.
Here is the syntax to eliminate render-blocking CSS files:
<link rel="stylesheet" href="style.css" media="print" onload="this.media='all'">* href points to the CSS resource you want to load asynchronously – here that CSS resource is style.css which may be different for you
JS
JS files have two direct methods called async and defer for asynchronous loading. Async and defer both allow simultaneous downloading of the specified JS files but these two are different in that the async files are executed immediately after they are downloaded but the defer files are executed after the parsing of the HTML document is completed. This makes async files to be executed early on the webpages compared to the defer files.
We can use the keywords async, or defer as an attribute inside the <script> tags of JS files in the webpages to load the JS files asynchronously.
Here is the syntax to eliminate render-blocking JS files using async attribute:
<script async src="main.js"></script>* src points to the JS resource you want to load asynchronously – here that JS resource is main.js which may be different for you
Here is the syntax to eliminate render-blocking JS files using defer attribute:
<script defer src="main.js"></script>You can read more about the differences between async and defer as well as two other somewhat similar things of preload and HTTP/2 server push from this article. That is to say, preload is used to solve the preload key requests warning from Google PageSpeed Insights. And you can read about how to solve the preload key requests warning for WordPress from this article.
This is how you can eliminate render-blocking resources warning of Google PageSpeed Insights. It is also applicable to any website.
Caution to Eliminate Render-Blocking Resources
Eliminating render-blocking resources can give you significant improvement in your page load speed. However, you need to be careful about doing it the right way. What I mean is that by eliminating render-blocking resources, you can cause your website to look ugly when it starts loading in the visitor's screen. See this screenshot for example:
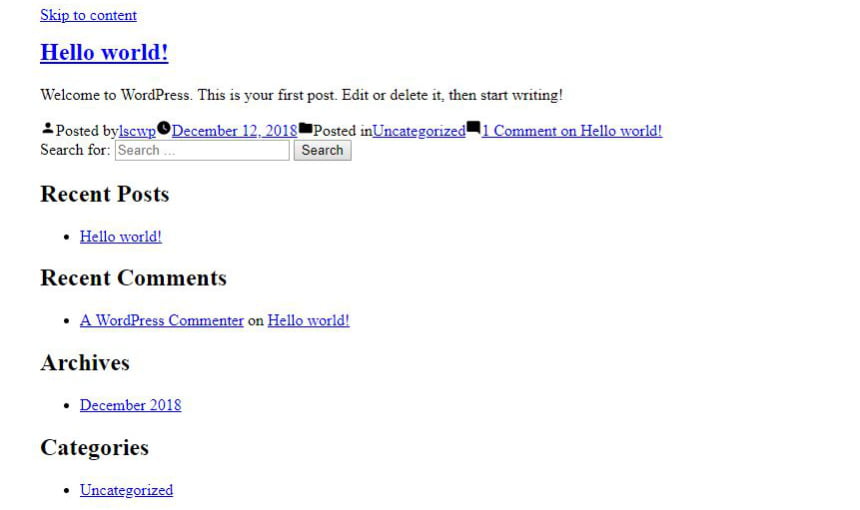
This is called Flash of Unstyled Content (FOUC) where the webpage first loads its contents without any formating and then after a while, it gets the formating and everything looks normal.
You have probably seen this FOUC before when browsing a webpage. And it certainly isn't something very pleasing to see on a webpage, many would even want to leave the site after seeing this.
If you eliminate render-blocking resources from your website, then the CSS and JS files necessary to properly format these contents might also be eliminated as render-blocking. But as you can see it is necessary to keep the formatting of this above the fold contents (contents that you see on your screen without scrolling) so that your webpages don't look ugly. And the resources needed to format these above the fold contents are a small part of the CSS and JS files which are called critical CSS and critical JS respectively.
Critical CSS and JS
Critical CSS and JS are the resources that are necessary to properly format the above the fold contents of any webpage. So, in order to prevent FOUC from happening on your site but to fix the eliminate render-blocking resources issue, you will need to extract this critical CSS and JS from your total CSS and JS files, then inline them or place them on your webpage's <head> element, and then eliminate the rest of the CSS and JS files.
If you are already worried after hearing about extracting critical resources and placing them in the <head> element, you can relax now as WordPress plugins can automatically do all that for you.
Though some websites might need some critical JS, the formatting of above the fold contents is mostly dependent on the critical CSS. So, in most cases, critical JS won't matter. Therefore, you can get away without generating Critical JS. That is to say, I don't know of any tools that do Critical JS generation. So, eliminating render-blocking JS files without generating Critical JS should just be fine.
Eliminate Render-Blocking Resources WordPress Plugin
You can use LiteSpeed Cache plugin to eliminate render-blocking resources WordPress issue for free or use WP Rocket, FlyingPress, Autoptmize + Async JavaScript, or some other plugins as paid alternatives. Critical CSS is generated in the plugin providers' server instead of your web server. That's why this is usually provided as a paid service. This is also why you won't get many plugins offering Critical CSS at all.
Consequently, any such plugins that don't provide Critical CSS but offer fix to eliminate render-blocking resources issue, they will do that by introducing the FOUC issue. So, you should be careful about that when choosing the right plugin.
LiteSpeed Cache
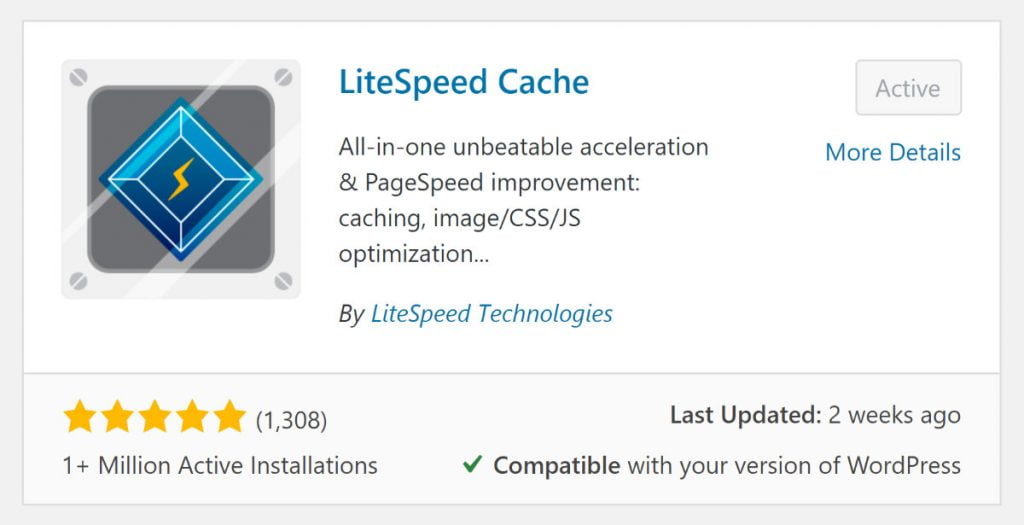
LiteSpeed Cache is a very popular and free speed optimization plugin for WordPress. However, many think that you can only make use of LiteSpeed Cache plugin if you also use LiteSpeed web server. But that isn't true because LiteSpeed Cache integrates with QUIC.cloud which helps unlock almost all its benefits to any WordPress sites. And the best part is you don't even need to use the QUIC.cloud CDN to use these features. Just set up your LiteSpeed Cache plugin with QUIC.cloud once, and you are good to go without ever worrying about it.
Because of the use of Critical CSS, LiteSpeed Cache can perfectly fix the eliminate render-blocking resources WordPress warning without introducing the FOUC issue.
Generating Critical CSS in LiteSpeed Cache is free up to a certain limit based on the web server you are using. But their limit is pretty generous and will be more than enough for most sites. Below is a table representing the free limits of different QUIC.cloud services. See the intersection between the Critical CSS column and your web server type to find out how much free quota you will have.
| Free Tiers | CDN | Image Optimization* | Critical CSS | LQIP |
|---|---|---|---|---|
| Basic | 1GB | 1,000 | 100 | 100 |
| LiteSpeed Server | 5GB | 5,000 | 500 | 500 |
| LiteSpeed Enterprise | 10GB | 10,000 | 1,000 | 1,000 |
| QUIC.cloud Partner | 20GB | 20,000 | 2,000 | 2,000 |
To know more about the pricing and free tiers of QUIC.cloud, see this article.
Connect LiteSpeed Cache with QUIC.cloud
To fix eliminate render-blocking resources WordPress warning using LiteSpeed Cache plugin, you will need to have the plugin installed and activated on your site.
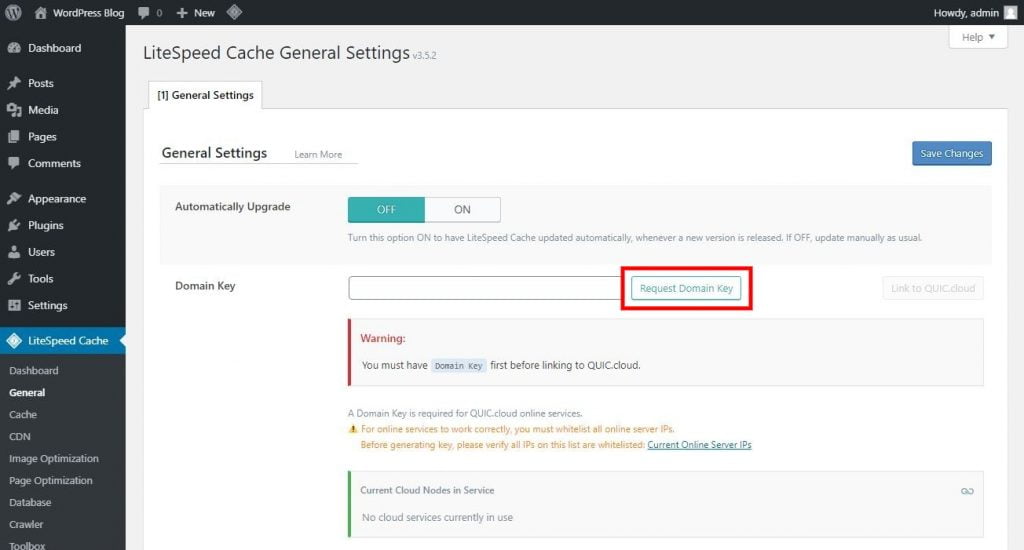
Then to be able to generate Critical CSS for your site, you will need to get a domain key for your site from QUIC.cloud. For that, go to LiteSpeed Cache > General from your WordPress dashboard. Then click on the Request Domain Key button from that page.
Then wait for sometime like a minute or so for your domain key to be automatically generated.
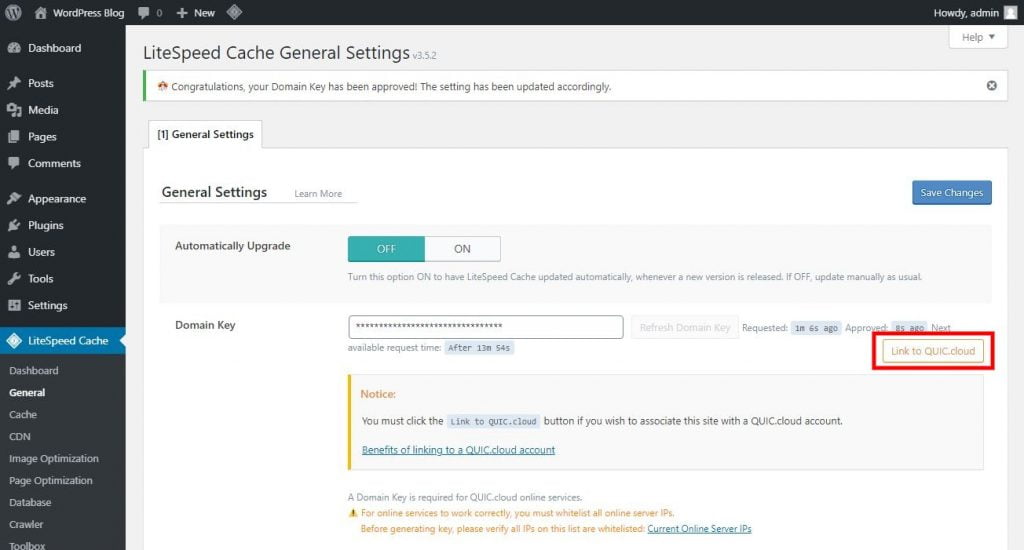
Then refresh the page and you will see some asterisks in the Domain Key field. This will mean your domain key has been successfully generated. In addition to that, you will see the Link to QUIC.cloud button on that page. However, you won't need to link your site to a QUIC.cloud account in order to generate Critical CSS so we won't be doing that now.
Eliminate Render-Blocking Resources CSS with LiteSpeed Cache
To setup your LiteSpeed Cache plugin to eliminate render-blocking resources for CSS in WordPress, first go to LiteSpeed Cache > Page Optimization > CSS Settings from your WordPress dashboard.
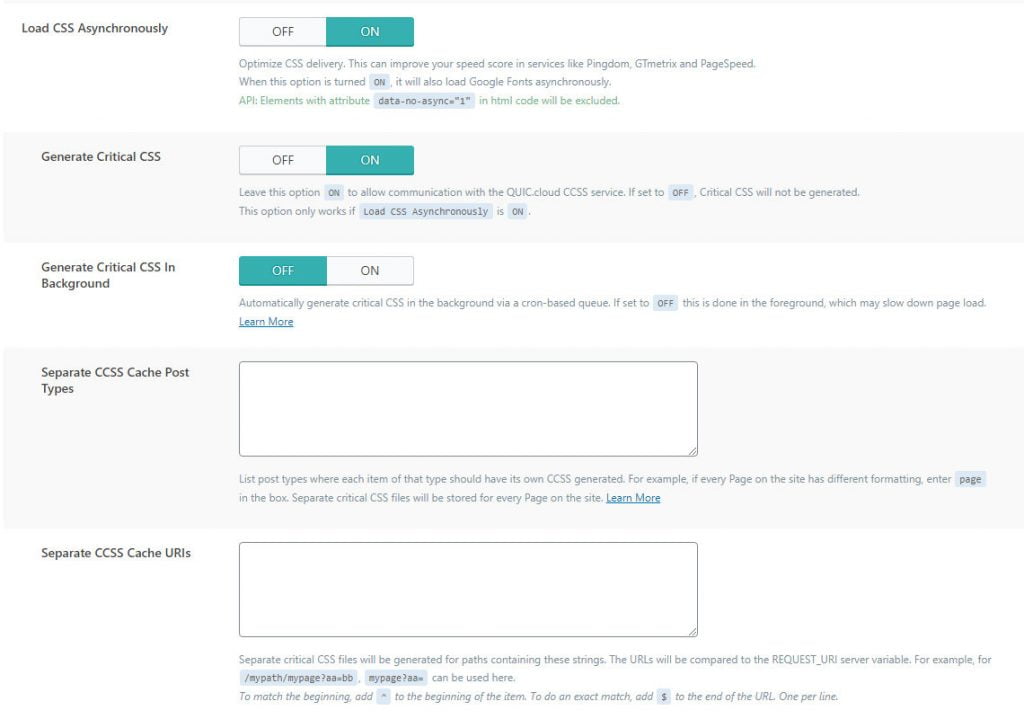
Then under the CSS Settings tab, turn Load CSS Asynchronously to ON, Generate Critical CSS to ON, and Generate Critical CSS In Background to OFF. Here, turning General Critical CSS in Background to OFF is necessary to avoid FOUC issue.
LiteSpeed Cache will generate one Critical CSS for each post type (posts, pages, products etc.), and taxonomy archive pages (categories, tags, product categories etc.) by default. So, each of the posts or pages within the same type will be using the same Critical CSS. This will be enough unless you have separately created individual pages or posts in any post type.
For instance, if you have used any page builder to separately design your homepage, contact us page, services page, and other pages, then you will need to enter page on the Separate CCSS Cache Post Types box. This way LiteSpeed Cache will generate a separate Critical CSS for each page inside the page post type. This will ensure that all your pages have the right Critical CSS.
If you have only a few pages or posts with individual designs, you can just enter the URI of those pages or posts in the Separate CCSS Cache URIs box instead of entering the post type on the Separate CCSS Cache Post Types box. This way LiteSpeed Cache will generate separate Critical CSS for those matching URIs.
Eliminate Render-Blocking Resources JS with LiteSpeed Cache
To setup your LiteSpeed Cache plugin to eliminate render-blocking resources for JS in WordPress, go to LiteSpeed Cache > Page Optimization > JS Settings from your WordPress dashboard.

Then under the JS Settings tab, turn Load JS Asynchronously to ON. This will defer the JS files on your website and thereby eliminate render-blocking resources JS warning.
Now the eliminate render-blocking resources WordPress warning should be fixed for your site when testing with Google PageSpeed Insights.
WP Rocket

WP Rocket is the most popular paid speed optimization plugin for WordPress. It makes everything super simple so anyone can easily customize its options without much digging into details. Its solution to eliminate render-blocking resources WordPress warning is also very simple.
First install and activate WP Rocket in your WordPress site.
To eliminate render-blocking resources for CSS in WordPress, you just need to go to Settings > WP Rocket > File Optimization from your WordPress dashboard.
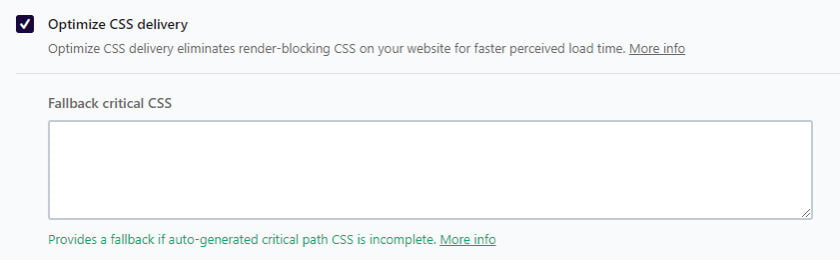
Then under the CSS Files heading, put a checkmark on Optimize CSS Delivery option. That's it. WP Rocket will now generate critical CSS for your site and eliminate render-blocking CSS resources from your WordPress site without introducing the FOUC issue.
WP Rocket will generate one critical CSS for each public post type (posts, pages, products etc.), and public taxonomy archive pages (categories, tags, product categories etc.).
To eliminate render-blocking resources for JS in WordPress, you will need to go to Settings > WP Rocket > File Optimization from your WordPress dashboard.
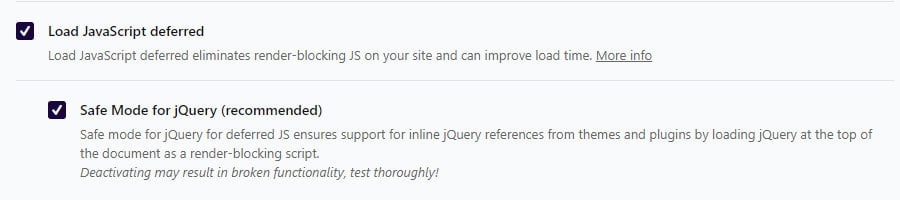
Then under the JavaScript Files heading, put a checkmark on Load JavaScript deferred. That's all you need to do to eliminate render-blocking JS resources from your WordPress site. However, if you want to go a step further and defer even the jQuery file, you can do so by removing the checkmark from the Safe Mode for JQuery (recommended) option. However, keep in mind that it may cause unexpected results in your site like broken functionality. So if you turn this option on, test your site thoroughly to see for any issue.
Autoptimize
Autoptimize is a very popular WordPress optimization plugin. It is also free but if you want to use critical CSS on your site, you will need to buy a subscription for that.
First, install and activate Autoptimize and Async JavaScript in your WordPress site.
Now to fix eliminate render-blocking resources WordPress warning for CSS, go to Settings > Autoptimize > CSS, JS & HTML from your WordPress dashboard.
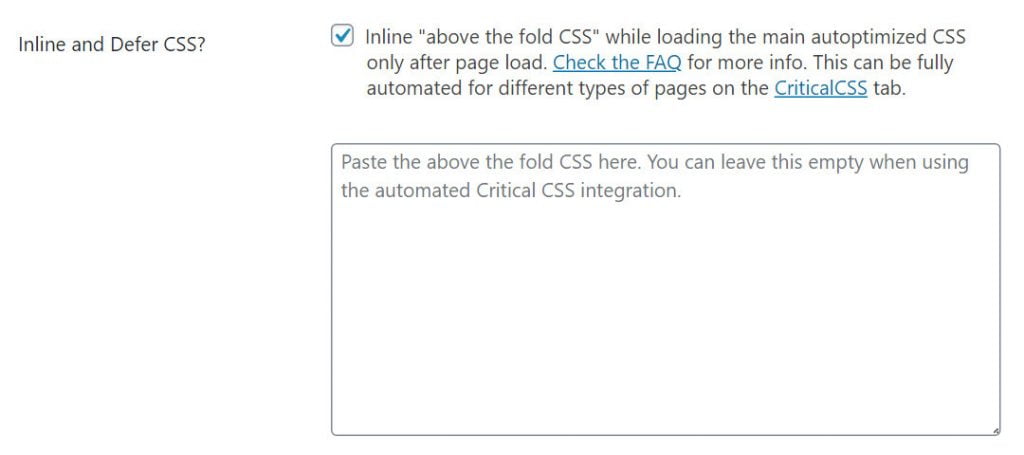
Then under CSS Options heading, put a checkmark on Optimize CSS Code? option, then also put a checkmark on Inline and Defer CSS? option. Remember, this Inline and Defer CSS option isn't going to work unless you enter your website's critical CSS in the below box. This will, however, be problematic as all the pages and posts on your site will use the same critical CSS which will cause different post types or individual pages not getting the right critical CSS.
That's why, to solve this problem, you will need to use the premium Critical CSS feature from Autoptimize which will automatically generate different critical CSS for different post types. In that case, you don't need to enter critical CSS in the Inline and Defer CSS box so keep that empty while using the premium Critical CSS feature.
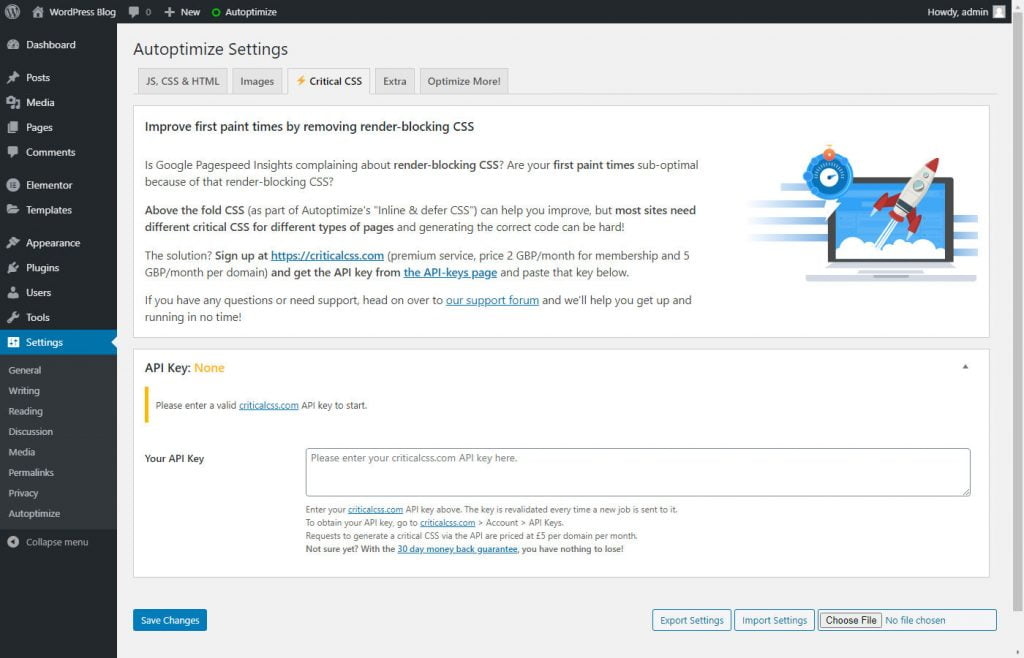
Now, to use the Critical CSS feature of Autoptimize, click on the Critical CSS tab from Autoptimize settings page. Then you will see it asking for API Key from criticalcss.com website. So, you will need to go to that site and buy one of their plans to get the API Key. once you get the API key, you will need to enter the in the Your API Key box and then click on Save Changes.
Then Autoptimize will automatically integrate critical CSS and eliminate render-blocking resources for CSS files in your WordPress site.
To fix eliminate render-blocking resources WordPress warning for JS, go to Settings > Autoptimize > CSS, JS & HTML from your WordPress dashboard.
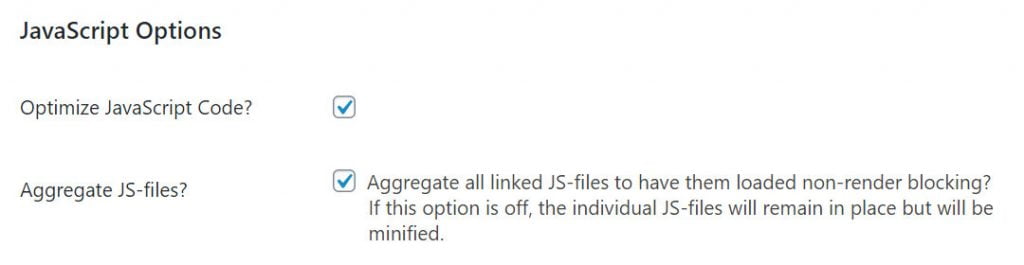
Then under the JavaScript Options heading, put a checkmark on Optimize JavaScript Code? option, then also put a checkmark on Aggregate JS-files? option. This will fix the eliminate render-bocking resources WordPress warning for JS files.
Async JavaScript
You can solve the eliminate render-blocking resources JS warning using the Autoptimize plugin. However, it doesn't give you much control over the loading of your JS files like you can't defer individual JS files without aggregating your JS files. So, if you want more control over these, you can do so by using the Async JavaScript plugin.
Autoptimize and Async JavaScript have been made by the same developer. But these two are standalone plugins so you can use any one of them without using the other or use both of them together to take advantage of both their features.
Install and activate the Async JavaScript plugin on your WordPress site. Then go to Settings > Async JavaScript > Settings from your WordPress dashboard.
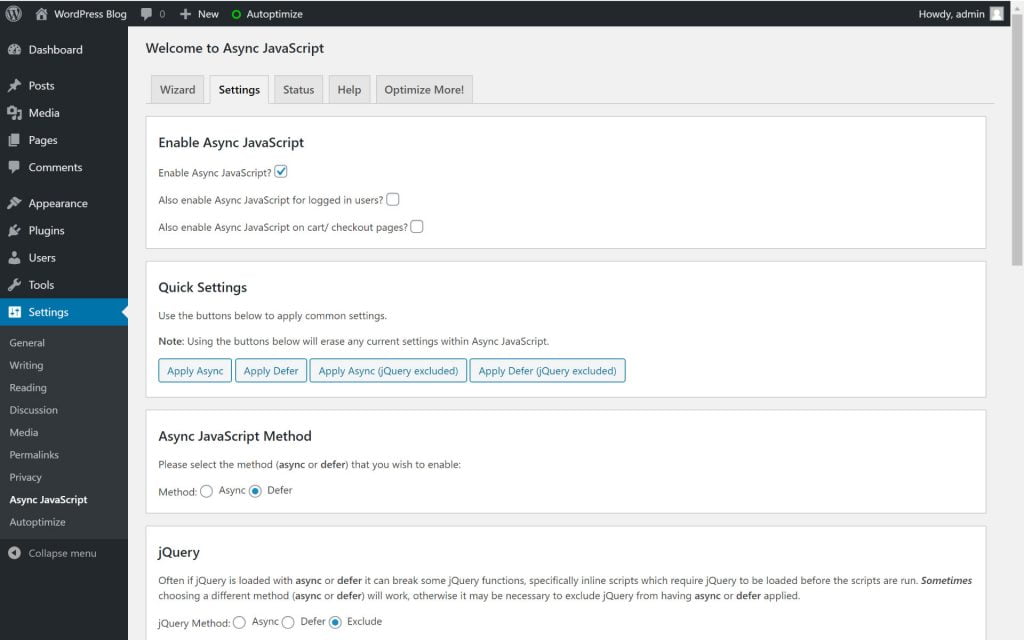
Then under the Enable Async JavaScript heading, put a checkmark on Enable Async JavaScript? option. Then you can select whether you want to use async or defer to control the loading of the JavaScript files. You also get to choose whether the jQuery file should be excluded from optimizing or if it should be optimized using async or defer. Remember to check your site thoroughly for any issue if you decide not to exclude jQuery from optimizing. Other than these, Async JavaScript gives you the option to specify JS files that should be included or excluded from optimizing.

When you are using this plugin with Autoptimize, it will give you the option to override Autoptimize's default use of the defer method with the async method.
I like your concept to load CSS without the FOUC issue. The trick was simple but I did not know it, even using LiteSpeed for the last 2 years.
We all have such moments here and there. Anyway, I am glad that I was of help.
Please help I am facing Eliminate render blocking CS and JS issues. Unable to define which plugin should I use. WP-rocket is also causing high CPU usage and resources.
I used Litespeed and face same problem, but for new visitor website look ugly and for the second time look ok.
Any Idea how can face this situation?
Thanx
maybe it is because of critical css not being generated the first time a page is visited. you can read that section from this litespeed cache settings guide.
How can I do it? I am using flying-press plugin in my site.
You have explained it in a very simple language. You really make my concept clear. Thanks.
These are not working; what exactly am I missing? I am loading all the files via CDN and still see these issues? Let's say if I use autoptimize and optimize these files, will it still work considering everything is loading from CDN?